The schedule for the next two days.
Tensile testing is used to test how much a material can stretch to. Researchers working in materials science use this test for a variety of reasons, such as to select the appropriate materials and quality control. From this test, we can also predict how the material would react when other types of forces are applied. The polymer we used was PCL. It was tough and was similar to the plastic we use to wrap our textbooks with (ignore if you don't know).
- Punch (like hole puncher that kind of punch) a thin layer of polymer using a press, choosing the proper shape-circle and rectangle (it looks like an hour glass) shapes. The circle ones are not used in this procedure, it would function as a scaffold for cell seeding later.
- After measuring the thickness of the polymer using an electronic micro screw gauge, we used an universal testing machine to test the tensile strength of the polymer.
- The machine uses the distance the polymer can stretch before breaking to calculate the tensile strength.
This is the PCL polymer that we used.
The "puncher"
Press hard!
The rectangle shaped stamp would punch out something like this. This isn't the polymer, this is just aluminium foil.
This is the polymer, but apparently the stamp blade wasn't sharp enough. So we had to cut ourselves.
TA-DA! This will be used for tensile testing.
Electronic micro screw gauge. Saves you all the trouble of reading the measurements. If all of us use this in schools, we would never have to learn how to read a micro screw gauge.
The universal testing machine. Its huge.
Just a frame to hold the polymer before attaching it to the machine.
Stretching in progress.
PIAAK! (There wasn't any sound.)
If you compare the two pictures, you will realise that the polymer in the first picture is slightly white in the middle, but not in the second one. This is because the polymer is elastic and would return to its original state after a while (It will still remain broken. It is not magic.)
The results! The sharp drop was when the polymer broke.
- added 70% ethanol and left under UV light for half hour to fully sterilise the scaffold. The scaffold used were pieces cut our from those we made in electronspinning in Day 2 as well as the circular polymers we punctured earlier in the day.
- After sterilisation, the scaffolds are washed in PBS thrice with half hour intervals
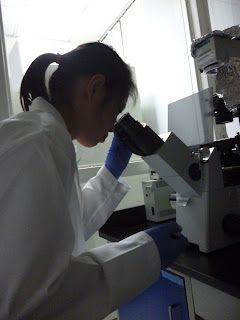
- we viewed the fibroblast cells under the electron microscope
- Trypsin is added to detach the cells from the plate surface and incubated at 37 degrees C for about 2mins.
- Centrifuge to spin down the cells and pour away the supernatant.
- Culture medium is added to the cells pipetted up and down to ensure a homogenous mixture.
- A small sample was taken and diluted to get a 10x dilution and we counted the cells. It was tiring and difficult because there were about 100+ cells in each grid.
- The remaining cells are placed on top of the scaffolds we prepared earlier and incubated at 37 degrees C overnight.
Stainless steel weights are added so that the scaffolds would not float.
MILLIONS OF CELLS.
This is a disposable hemocytometer made out of plastic. The one we used with Ajay is reusable. If you want to know more about counting cells, check out our Day 4 post!
We loaded the samples ourselves!
Hard at work counting cells. Poor Alethea had to count in her head. She lost count many times.
Adding DMEM after the cells are added onto the scaffold. Dr Wen Feng explains that a smaller well tray is used because less solution will be required and hence saving resources.
- preparing the reference and sample. We only required 3mg so tiny tiny pieces of PCL was weighed using a electronic microgram weighing balance.
- Sample was put in an aluminium pan and sealed with a press.
- Loaded sample and reference into the machine and the procedure was designed before it was started. The machine would take slightly more than 2 hours to complete the cycle.
Electronic microgram weighing balance.
The small little bits of PCL above the "s" and the "m" are all that we need.
We sealed the PCL inside these small little aluminium pans. Dr Wen Feng says that only a small amount is needed because sometimes the compound that are used are very expensive.
The machine we used for DSC.
Different kinds of pans are used for different things. This is used to hold liquids.
Whereas this is used to hold solids.
Loading in the reference and samples!
How to operate 101
This is process that we designed. Ramp means increase/decrease temperature. Isothermal means keep constant.
According to the schedule for today, we were supposed to visit the SBS Animal House. But due to time constraint, we couldn't go. ): Dr Wen Feng promised us to bring us there tomorrow, so all of us are looking forward to tomorrow! Stay tuned!


No comments:
Post a Comment